Raspberry Pi thermostat - Python Controller
This is a continuation of the Raspberry Pi thermostat series. The hardware part can be found here.
Summary
With the hardware built, now we need software to control the thermostat.
I decided to use Python for its simplicity. At first, I put up a simple website where I can control the thermostat using my phone. Soon, I realized it's actually easy to integrate with Apple Home via Homebridge so I implemented the interfaces required to get that working as well. Doing that let me do things like "hey siri, set the thermostat to 26 degrees".
The following is the overview of the solution:
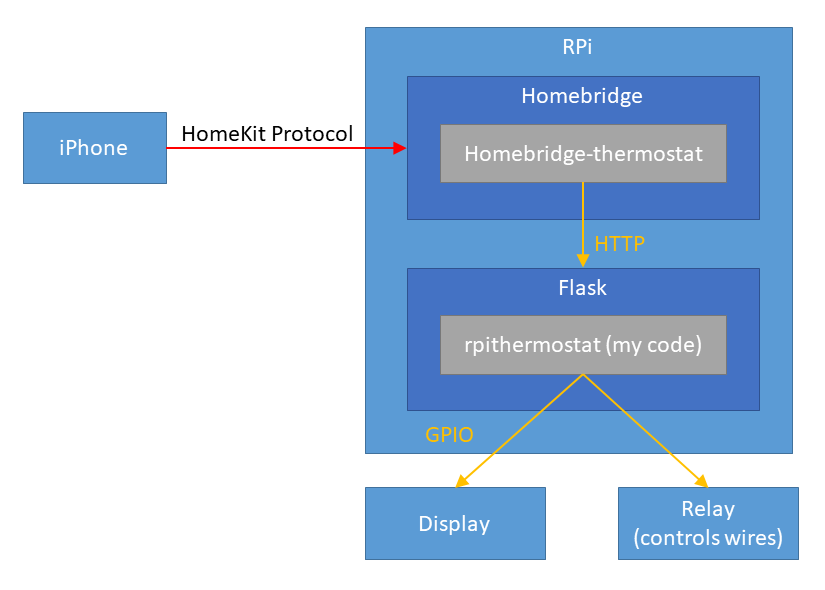
The code is here, but it has lots of features that are not necessarily used today.
Python Server
Libraries
- RPi.GPIO for controlling GPIO pins. This comes with the Raspbian OS already.
- Flask to put up a simple HTTP interface for homebridge.
- DHT11 for interfacing with DHT11 sensor.
- Adafruit_Python_CharLCD to control the 1602 display.
Components
The server just spins up a bunch of servers (implemented as threads) that polls sensors and carry out actions. Whether Python performs well with multi-threading is irrelevant here since the CPU is mostly idle.
There are 5 parts: pconfig, display, temphumids, oracle, and server.
pconfig - for persistent configuration
Since Raspberry Pi can lose power or need to restart for updates, you need to save the configuration on the main disk.
The code is dead-simplee. It just reads from and writes to a JSON file every time you ask. Because the call volume is so low, there is no performance impact to worry about.
Stuff that is saved: * Target temperature day & night - I find that I always want the temperature to be 2 degrees C higher than during the day, so I have a separate profile for that. * Target humidity * Current Governor (see below)
temphumids - temperature & humidity sensor
temphumids records the temperature & humidity every second.
You can also query for the latest sampled temperature & humidity. In reality, I take an average of all the samples collected in the last 30 seconds because DHT11 measurements fluctuate a bit.
display - displays two lines
Display literally accepts two lines to display and just forwards it to the LCD.
oracle - tells controller what to do based on your preference
What the oracle does
is simply to run what I call a 'governor' periodically (30s)
carry out actions. Definitely not the best design but the program is small
enough that it does not really matter much.
I have three governors: off, cool and heat.
| Governor | What they do |
|---|---|
| off | This governor just leaves everything off. |
| cool |
This governor makes sure that your home is cool and dry. The interesting thing
I learned is that leaving the fan ON makes your home very humid even with the
cooling coil on. Apparently the reason is that if the fan is on, the water has
no chance to condense on the coil.
|
| heat | This is pretty simple, it just turns heat on whenever it's cold. It doesn't really care about humidity because there is nothing you can do in winter to improve the situation. |
server - interface for homebridge-thermostat
Homebridge is an open-source NodeJS server that interfaces with Apple Home via HomeKit API.
Using the homebridge plugin homebridge-thermostat, you can just provide the HTTP interface for the thermostat and let your iOS devices control your thermostat. The plugin is poorly documented but I was able to read the source code to find out what APIs you need to implement.
Interfaces you have to implement: * /status return the governor, temperature and humidity information * /targetTemperature/t - set the target temperature * /targetRelativeHumidity/rh - set the target humidity * /off - set governor to off * /comfort - set govenor to heat * /no-frost - set governor to cool
Make the server run on boot
Of course, we want this service to be running all the time. The best way to achieve this is to make it into a systemd service. Making a simple systemd service is very easy. First, write a service definition file like this:
[Unit]
Description=Raspberry Pi Theromostat
After=syslog.target

[Service]
Type=simple
User=pi
Group=pi
WorkingDirectory=/home/pi/src/rpi-repo
ExecStart=/bin/bash -c "FLASK_APP=rpithermostat.server ./venv/bin/flask run --with-threads -h 0.0.0.0"
StandardOutput=syslog
StandardError=syslog

[Install]
WantedBy=multi-user.target
This works great because all the standard out and error just gets redirected to syslog, which is what you want normally anyway.
To install this, just copy the file into /etc/systemd/system/. Then run systemd enable servicename
to make it run when booted up. Run systemd start servicename to start the service right away.
Other caveats
The homebridge would randomly stop working. I never bothered to figure out why, but I "solved"
the issue by just creating a cron job that restarts every hour (0 * * * * systemctl reboot).
It has been working well for many months now without any issues.
Future Improvements
I could improve the heat governor by making it control the power outlet attached to a humidifer in winter. That way I can make the humidity just right.
Raspberry Pi thermostat - Building the hardware
This blog is about building my own thermostat with Raspberry Pi. This is part 1 where I explain the hardware. Part 2 talks about how I build the software that controls it.
What did I not like about the mercury thermostat?
I didn't like my old mercury-based thermostat for a couple reasons. First, the temperature fluctuation was pretty significant, up to 3 degrees C because mercury takes a while to react to the temperature change, Also I didn't like having to go to the living room to adjust the thermostat all the time.
Why did I not just use Ecobee or Nest? This was for fun & to learn how to build basic electronics using RPi ;)
Prerequisite
The interface to the HVAC is a simple single stage 4-wire control.
heatresistive heat strips - white - not used- fan - green
coolingheat pump - orange- power - red
Thank you /u/Nephilimi for the correction.
Basically, you just need to connect the power wire to what you want to turn on.
Connecting power to
heat or
cooling will heat/cool your coil.
Since I live in an apartment equipped with a heat pump, connecting power to heat pump will cool in summer and heat in winter.
Then you also need to run the fan for the air to circulate.
Parts needed
- Raspberry Pi - it can be any model really, but you want wifi for remote control.
- You need 3v, 5v, GND, and 4 GPIO pins minimum. 7 more for a 1602 display.
- Soldering equipments (example)
- Lots (10~20) of female to male jumper cables (example)
- Wires - I just used a 22 gauge wire
- Prototyping board (example)
- 3 x 2.2k and 3 x 10k Resistors
- 3 x 2n2222 NPN transistors
- DHT11 digital temperature & humidity sensor
- Minimum 3 channel relay (this is what I used)
- A 1602 display, if you want to display status also. It's named 1602 because it displays 2 rows of 16 characters.
Circuit
Here's the schematic for the core parts:
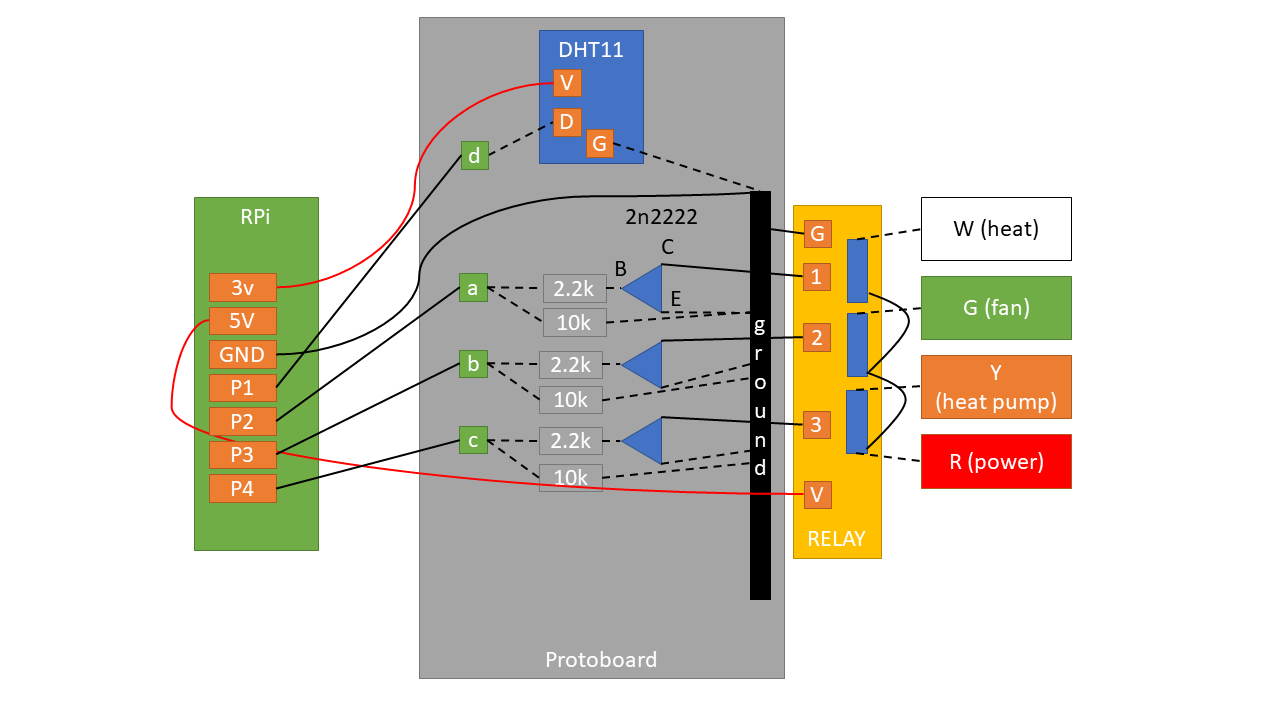
Solid lines denote where I had to use a wire. Dotted lines denote where I didn't have to use a separate wire thanks to either the board or existing wires.
Pins
P1 ~ P4 denote any free GPIO pins.
- 3.3v to power DHT11.
- 5v to power the relay.
P1communicates with DHT11 (both read/write).P2~P4controls the three relay outputs.
Communicating with DHT11
DHT11 needs only one data pin because it both handles input and output through the same pin.
Controlling the relay
This was the only non-straightforward part that required a bit of thinking. When the relay is powered, the switches are simply disconnected. In order to 'close' (or, connect) the switch, you need to drain the current from the relay pins.
This is where the NPN transistor helps. It has 3 parts: base (B), current (C) and
emitter (E). Electricity flows from C to E, only if voltage is
applied on B.
In this case, C accepts current from the relay, but it doesn't let it go through
E unless B has voltage. And we control the voltage by setting the line high
from the Rpi.
So in my circuit, asserting P1 high connects power to
heat. P2 and P3
controls fan and cooling
respectively.
Finished hardware
Here's a ghetto looking finished thermostat in action:
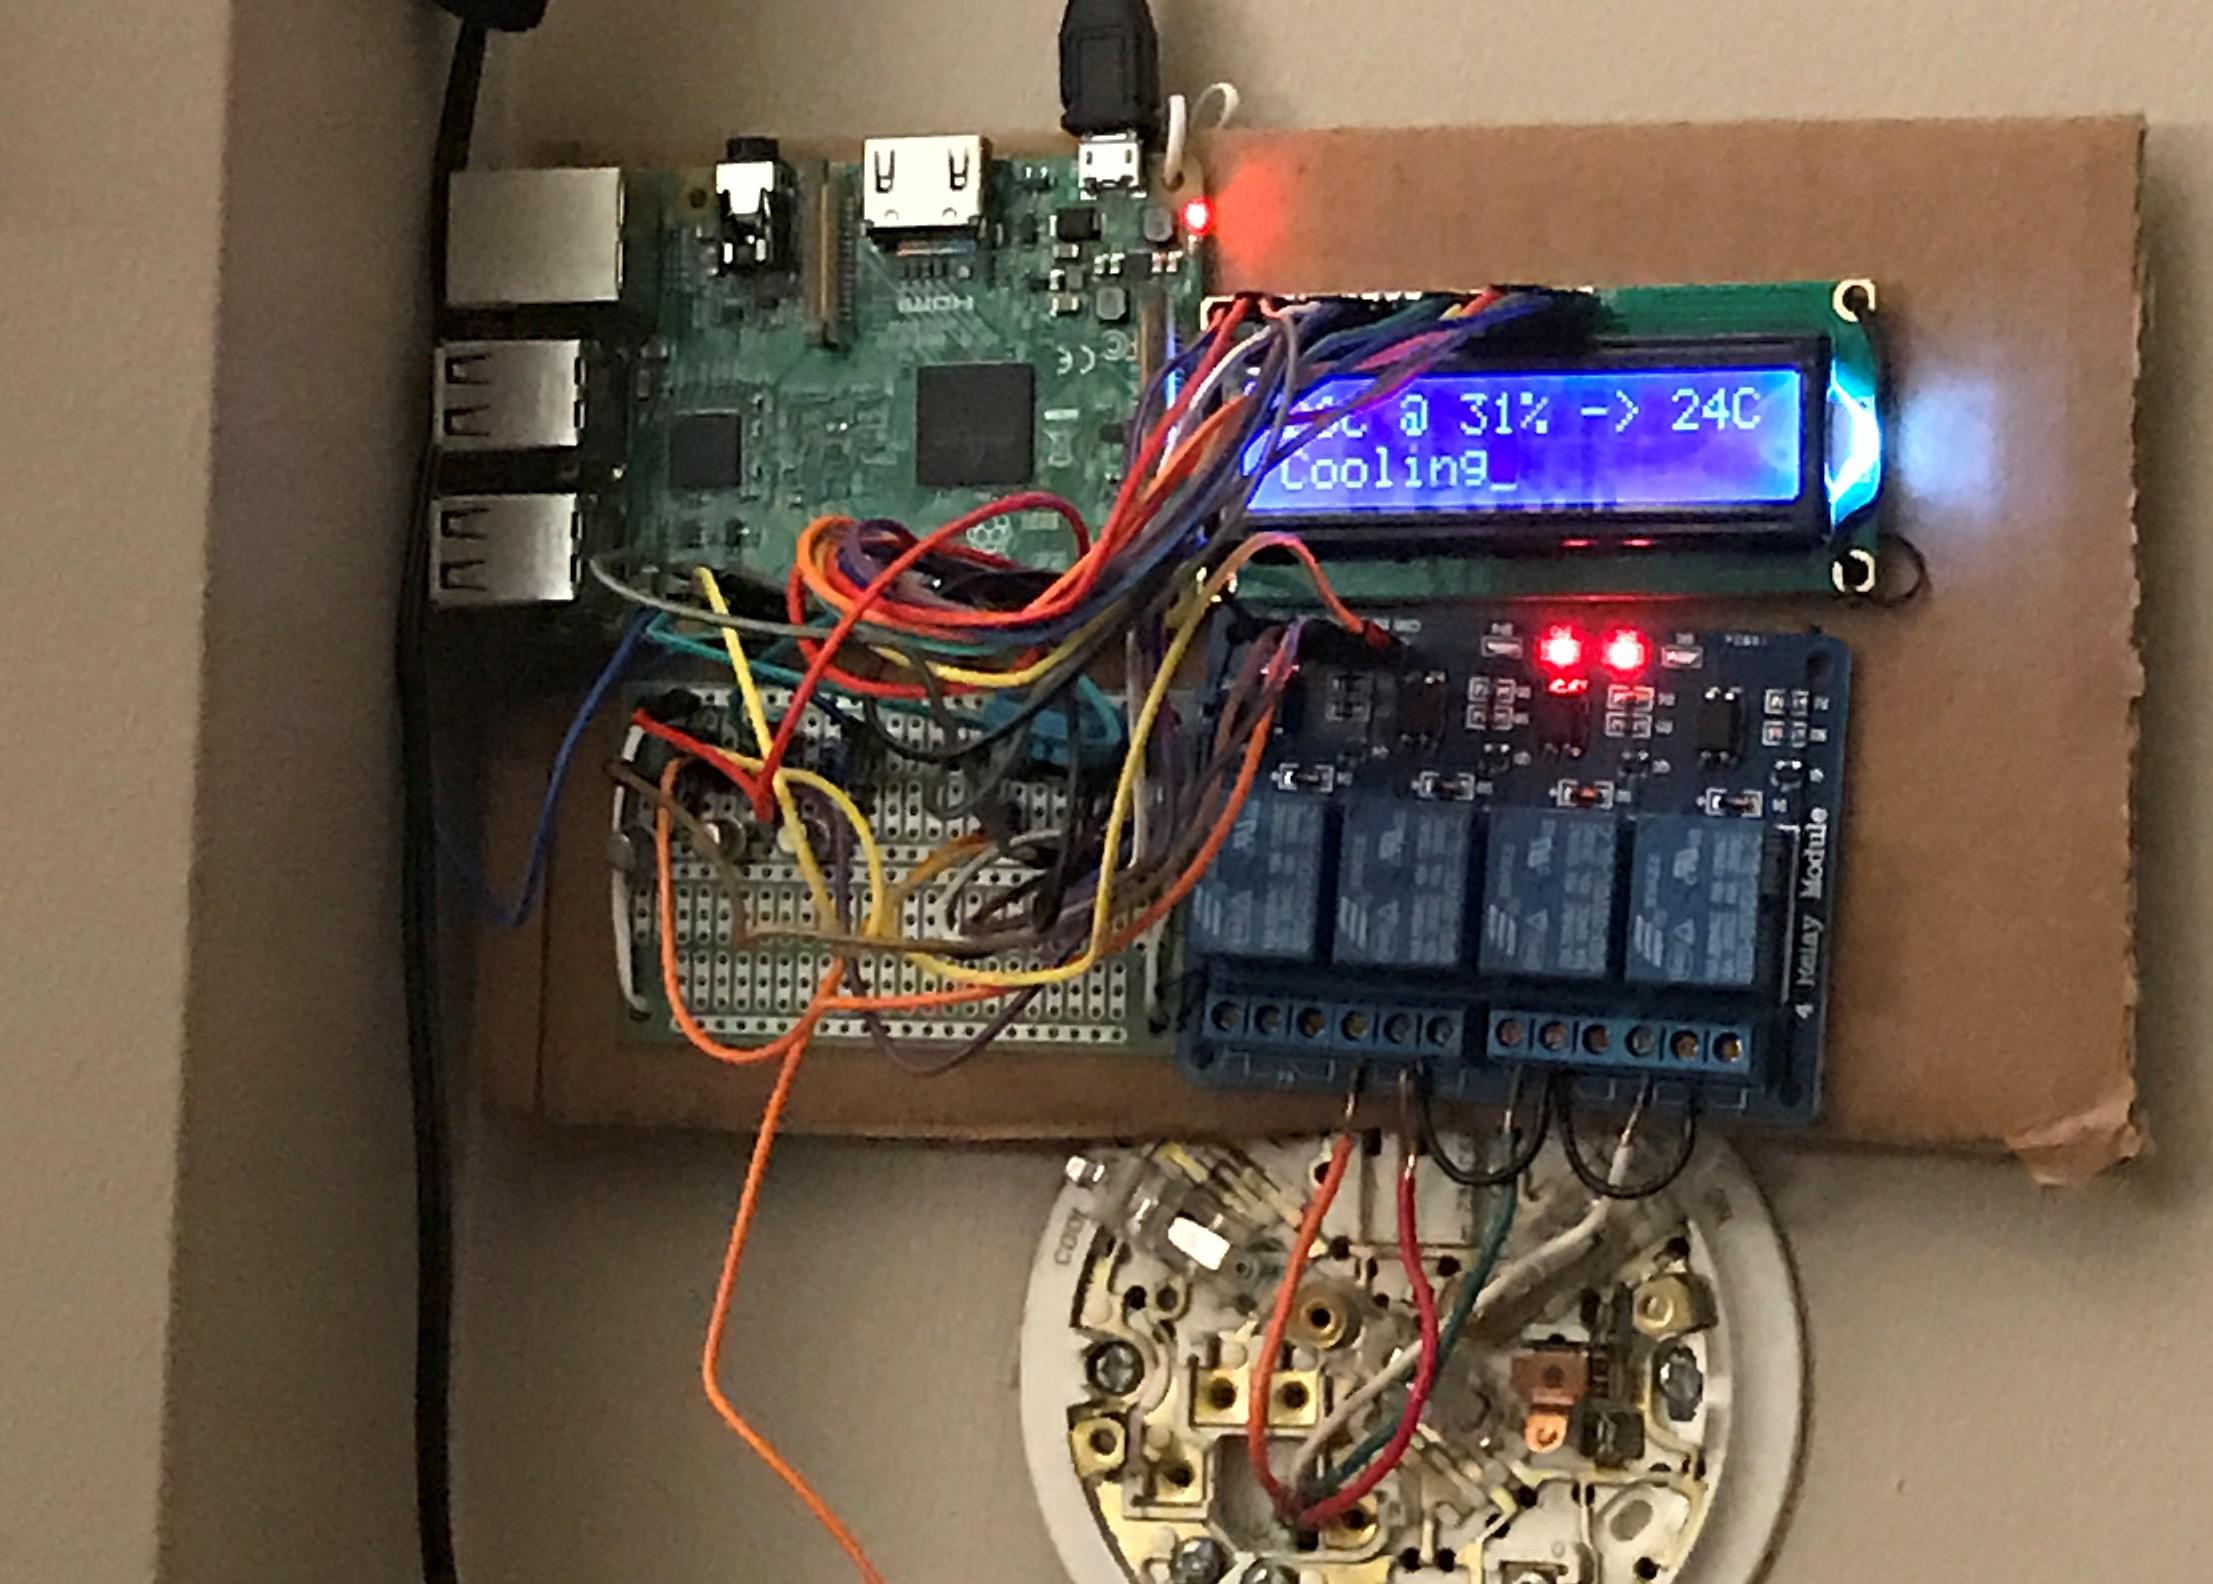
Due to my lack of any real hardware skills, I could not put together in a more polished way.
What's next?
Check out the part 2 for the software that runs this thermostat.
tmux.conf with clipboard integration & extra features
I have been using the terminal multiplexer tmux for almost two years now, but I never used its mouse support. The big reason was that it messed up the native terminal copy-paste support.
I spent some time reading the tmux(1) man page, and finally got something working that's comparable to gui terminal emulators like gnome-terminal.
Nice things I added here:
- Copy mode selection with keyboard/mouse will copy into the clipboard, rather than just the tmux buffer.
- Right click to paste from the clipboard.
- Middle click on the window label to close a window.
- Double click on any window label to open a new window.
- Drag to re-order windows.
For those who are not familiar with tmux terminology, a tmux "window" is comparable to a browser "tab".
Here's the relevant tmux.conf parts annotated (my actual tmux.conf is here):
#!tmuxsh
# Enable mouse support.
set -g mouse on
# Middle click on the window label to kill it
# "=" is apparently a macro for the "selected window number" but only for
# a certain set of commands.
bind-key -n MouseUp2Status kill-window -t=
# Drag to re-order windows
bind-key -n MouseDrag1Status swap-window -t=
# Double click on the window list to open a new window
bind-key -n DoubleClick1Status new-window

## Clipboard integration (only applicable when you have an X server running)

# Selection with mouse should copy to clipboard right away, in addition to the default action.
# Unbind the default action first.
unbind -n -Tcopy-mode-vi MouseDragEnd1Pane
bind -Tcopy-mode-vi MouseDragEnd1Pane send -X copy-selection-and-cancel\; run "tmux save-buffer - | xclip -i -sel clipboard > /dev/null"
# Copy mode copy should also copy it to the clipboard as well.
unbind -Tcopy-mode-vi Enter
bind -Tcopy-mode-vi Enter send -X copy-selection-and-cancel\; run "tmux save-buffer - | xclip -i -sel clipboard > /dev/null"
# Right click to paste from the clipboard
# If you like middle click better, change MouseDown3Pane to MouseDown2Pane for middle click.
unbind-key MouseDown3Pane
bind-key -n MouseDown3Pane run "tmux set-buffer \"$(xclip -o -sel clipboard)\"; tmux paste-buffer"
A few interesting things to note:
- The equals sign (
=) in kill-window is a macro for the selected window number. But, it only works with specific commands, in an unescaped form. You can't doconfirm-before "kill-window -t=". Don't waste your time trying to get it working. - You must redirect xclip output into
/dev/null, or tmux will hang (Relevant SO link). - Also, If you are not using the vi key binding, all the un/binds with
copy-mode-viin it, needs to be replaced with copy-mode and their respective key binding. The default tmux key binding is actually hard-coded in their source code. - Notably, this seems to work pretty well on the latest release of Windows 10 Bash on Ubuntu on Windows / WSL (Wow, what a mouthful name!). Just run an X server like Xming and your clipboard will integrate with the Windows clipboard. Now I can use tmux full-time on Windows.
What can be improved:
- Disable the clipboard integration if X is not available. Since I always work with X, I didn't think this was useful.
- It does not select a word like on double click.
- Right after selection, it exits the copy-mode. It's kind of jarring.
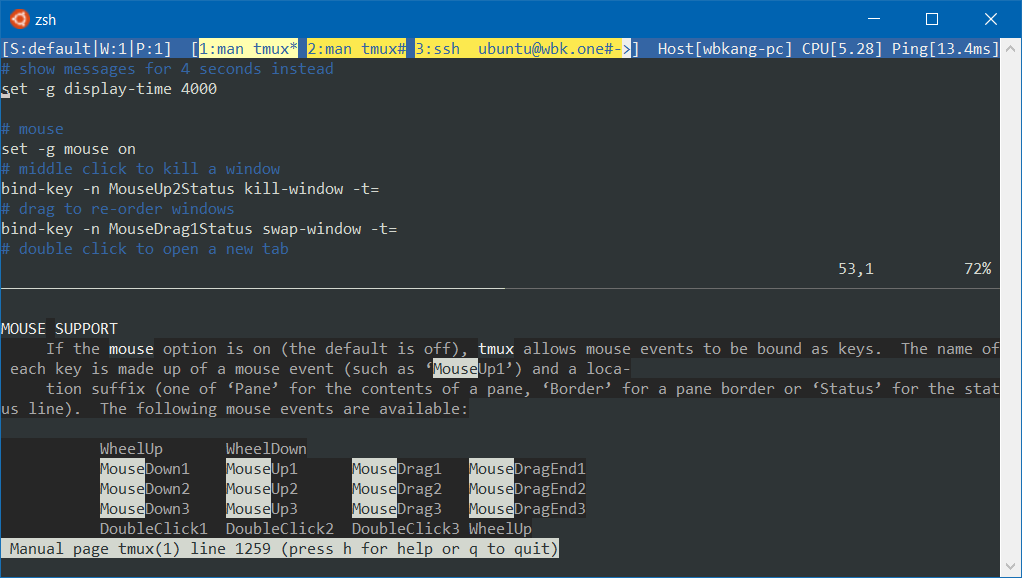
Screenshot (well.. it doesn't look any different with mouse support)
San Francisco Trip Part 2 - MOAH
Part 1 is here.
We dropped by a small house museum called the Museum of American Heritage (MOAH) on the way to Stanford University. I wasn't sure what to expect but it turned out pretty good. A pinball exhibition was ongoing when we were there so that was fun to play with. And there were many interesting old gadgets. A volunteer named Jim was guiding us throughout the visit.

Ever wondered why pinball is named so? Well, when they first made it, it was literally a bunch of pins and a ball, no flappers or anything else. Hence the name "pinball". The earlier machines didn't require too much skill.
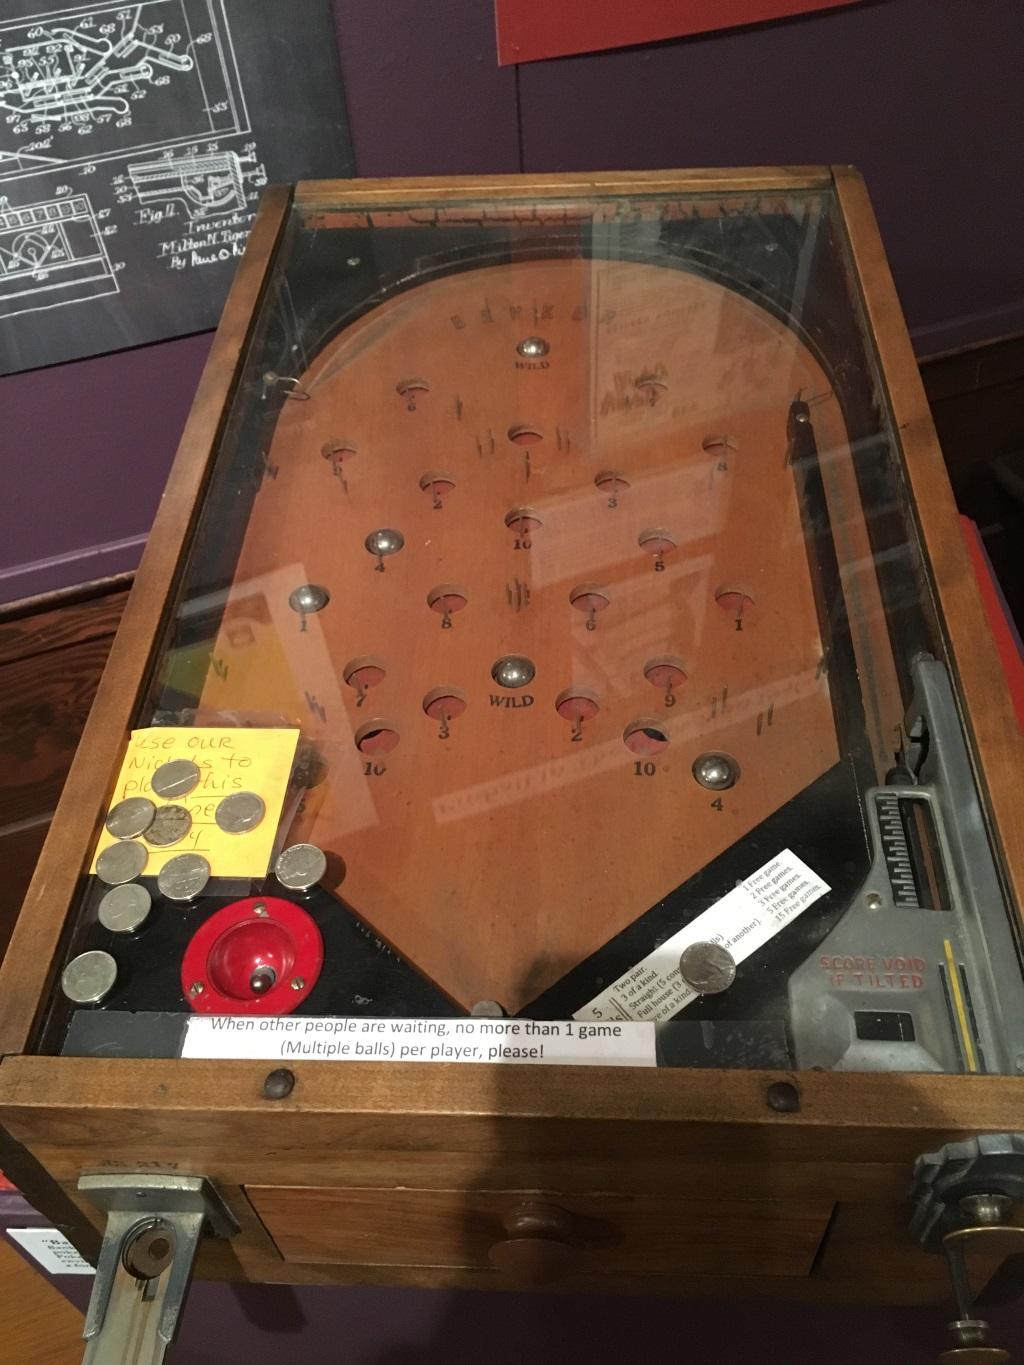
The sticker says
- two pair - 1 free game
- 3 of a kind - 2 free games
- straight - 3 free games
- full house - 5 free games
- four of a kind - 15 free games
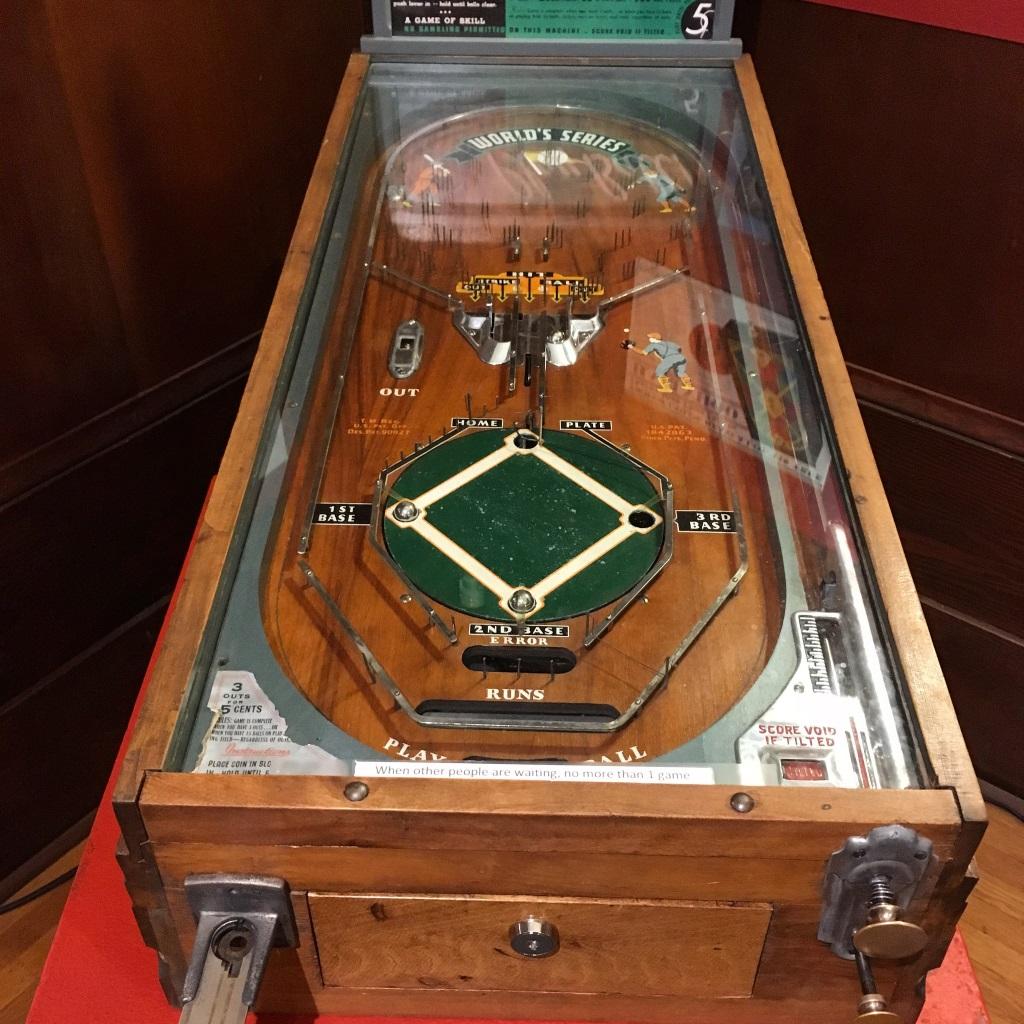
When a ball makes it to the "hit" section, the entire plate rotates. Unlike all other mechanical pinball machines, this one was actually pretty fun to play.
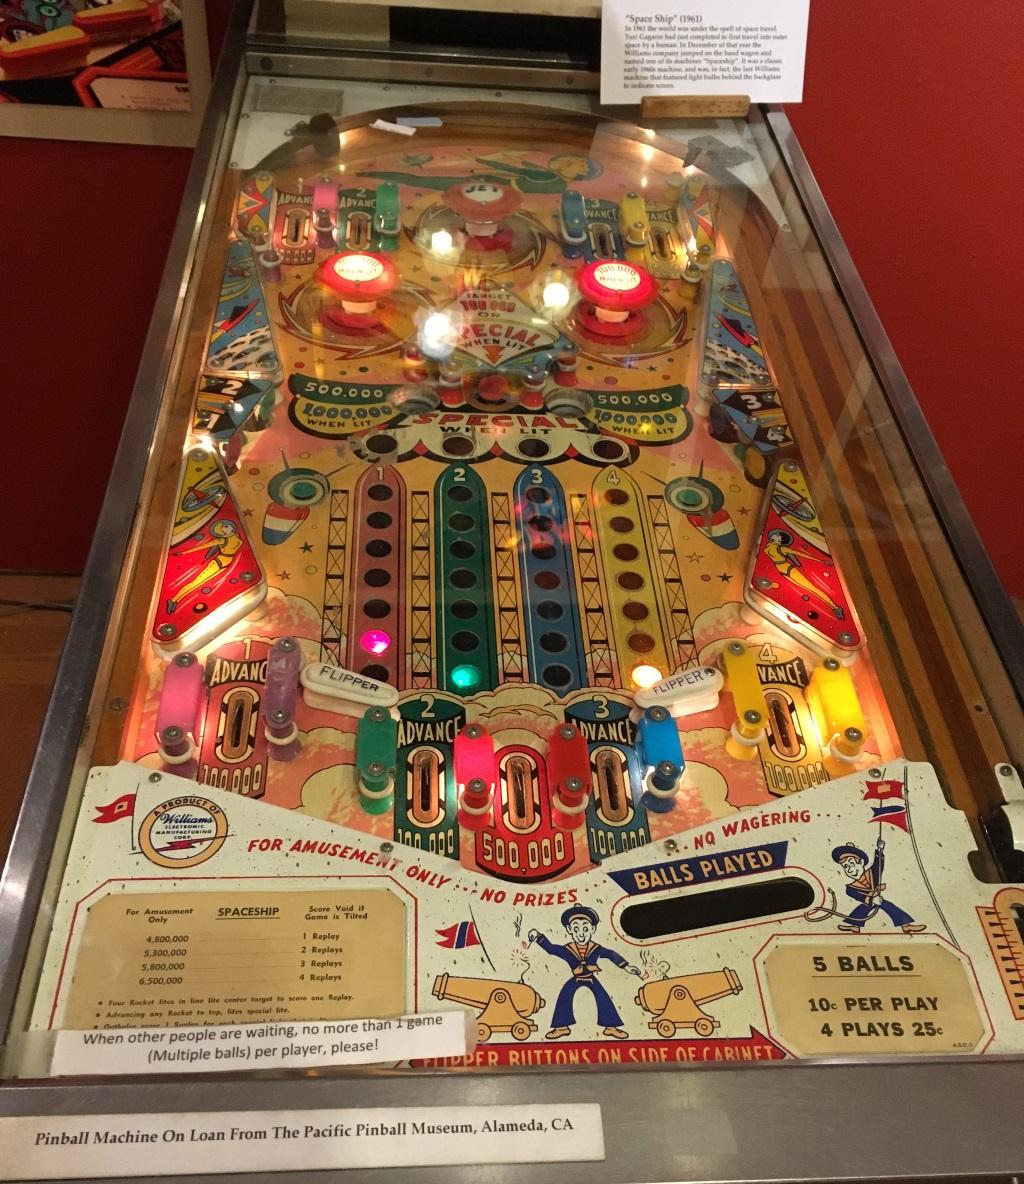
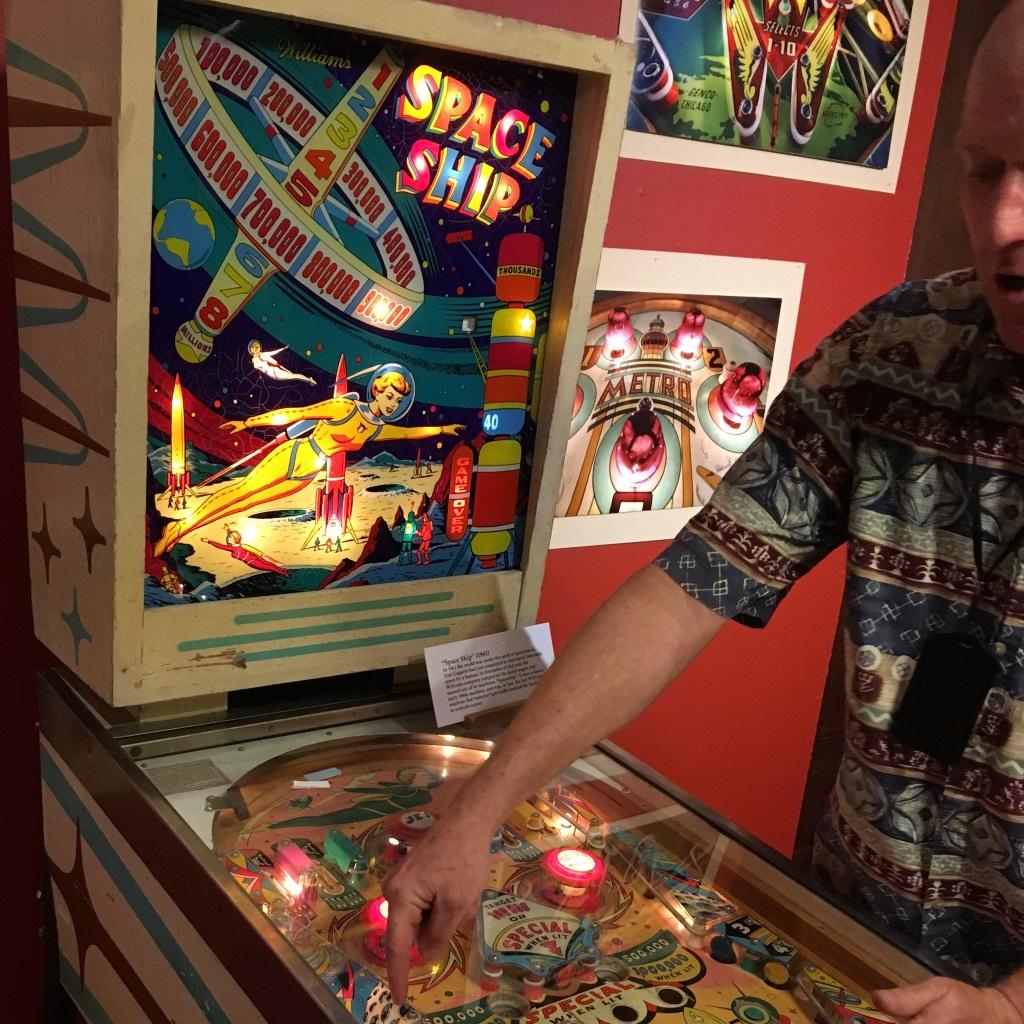
Jim the volunteer told us is that quite a few pinball machines had nice backglass arts that expressed many progressive social ideas for the time, like female astronauts. Supposedly, those backglasses are more valuable than the pinball machines themselves.
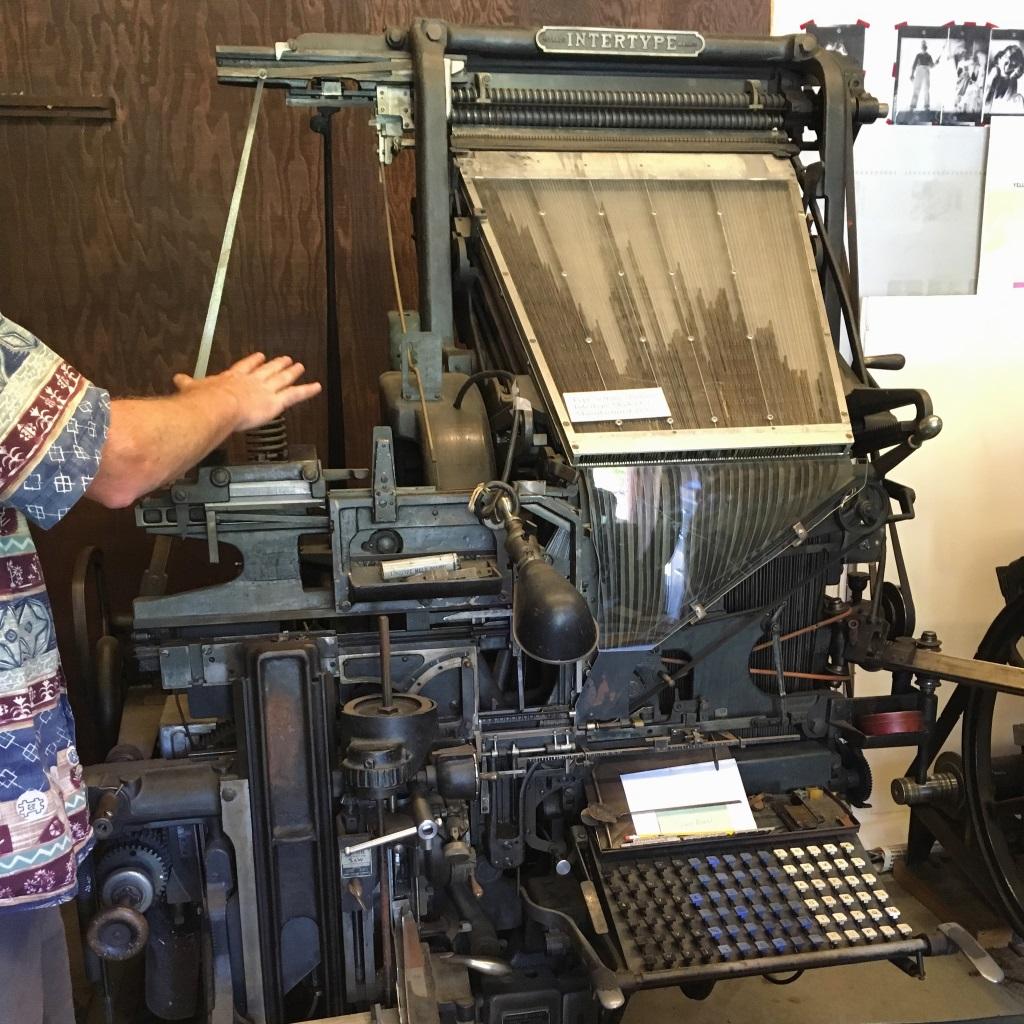
The Intertype machine made typesetting dramatically faster. At the backside of the machine, there is a cylinder of molten lead. As you type on the machine, the moulds for the letters you type fall into the tray in front of you. Then as you "flush" the current line, the molten lead is cast into types that you can use to publish newspapers faster than ever.
This machine helped the invention of daily newspapers. The machine was very expensive so people came up with various ways to keep it busy 24/7. One such way was to typeset a national newspaper earlier in the day, then to typeset a local newspaper later in the day (*I think this is kind of similar to how earlier computers were all time-sharing systems; Computers were very expensive and valuable back then*).
Unfortunately, I didn't really get to see it running live. They stopped running it live after many parents expressed concerns about their kids (at the museum) being exposed to lead fumes and all.
San Francisco Trip Part 1
I was visiting San Francisco from June 1 to 7. Here are some pictures I took.


It's nice and warm when the sun is up but it gets really cold as soon as you are in the shade. Ocean wind, I guess. In general, you need to wear a t-shirt and carry a thick sweater to wear in case it gets cold.

I liked seeing many old 80's cars in SF.
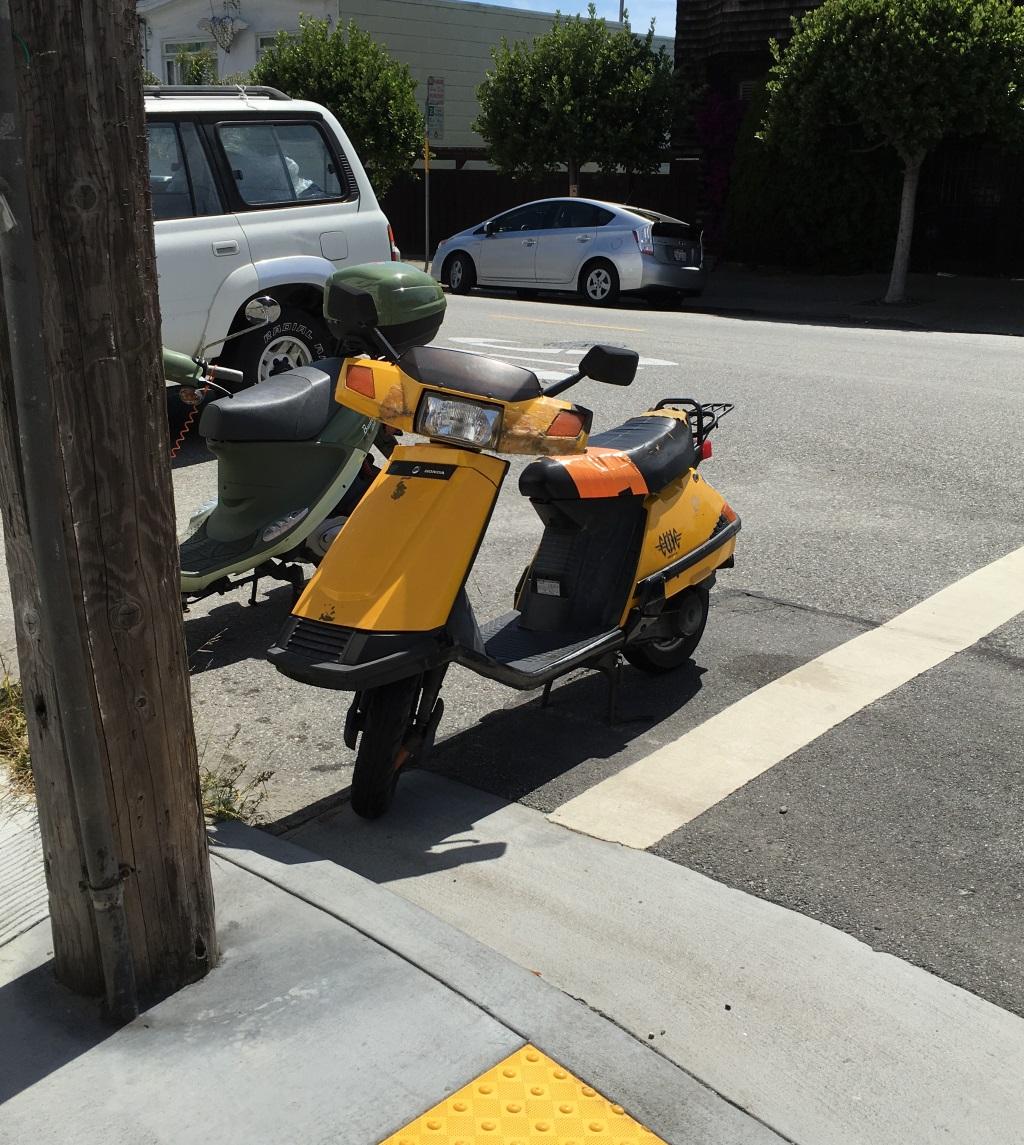

The city is also incredibly hilly.

There were many tasty mexican joints as well. A lot more common than the Chinese restaurants in Toronto.

I'll post more later.